The application provides a simple way to customize the mobile app’s home screen.
Header Image
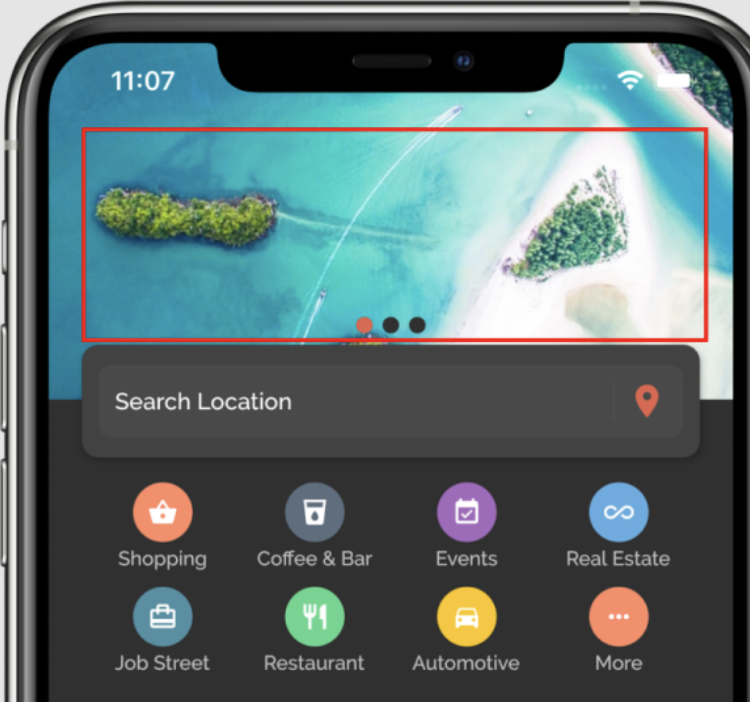
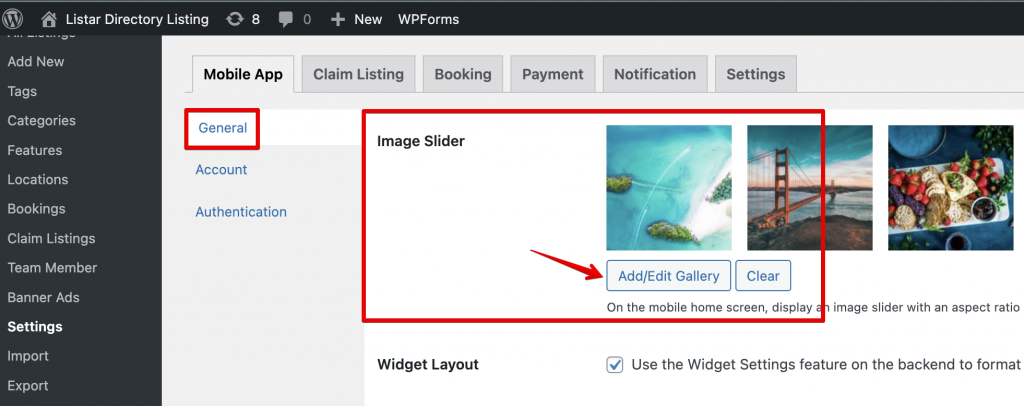
Settings → Mobile App → General
Select Image Slider fields to add banner images.
On the mobile home screen, display an image slider with an aspect ratio of 2:3. For example, use an image size of 375px by 250px.
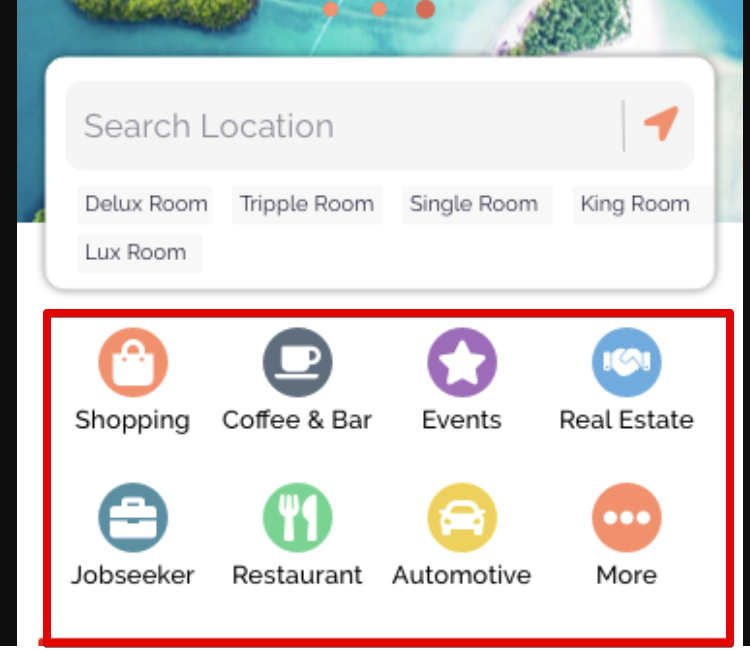
Categories
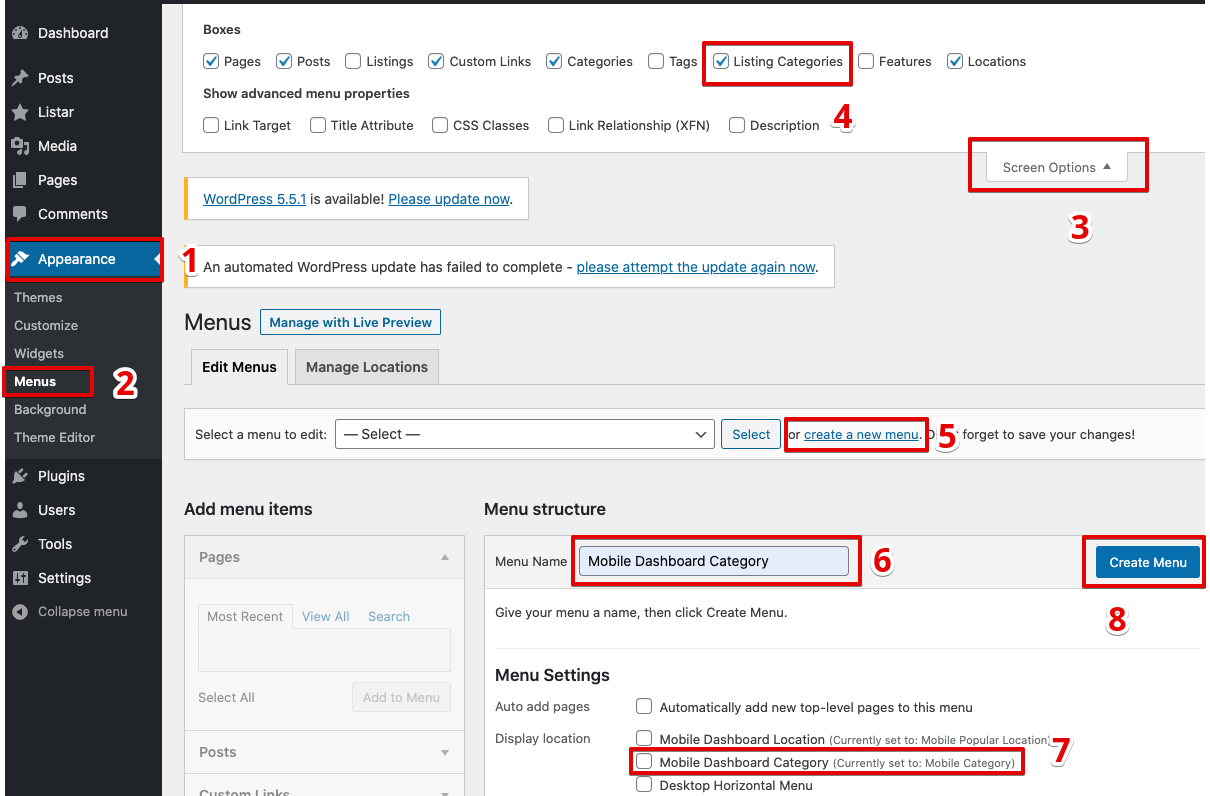
Appearance → Menu
- Enable option Screen Options → Listing Categories
- Select “create a new menu”
- Input your menu name on the filed “Menu Name.”
- Check on Menu Settings → Display location → Mobile Dashboard Category
- Press to save with the button “Create Menu“
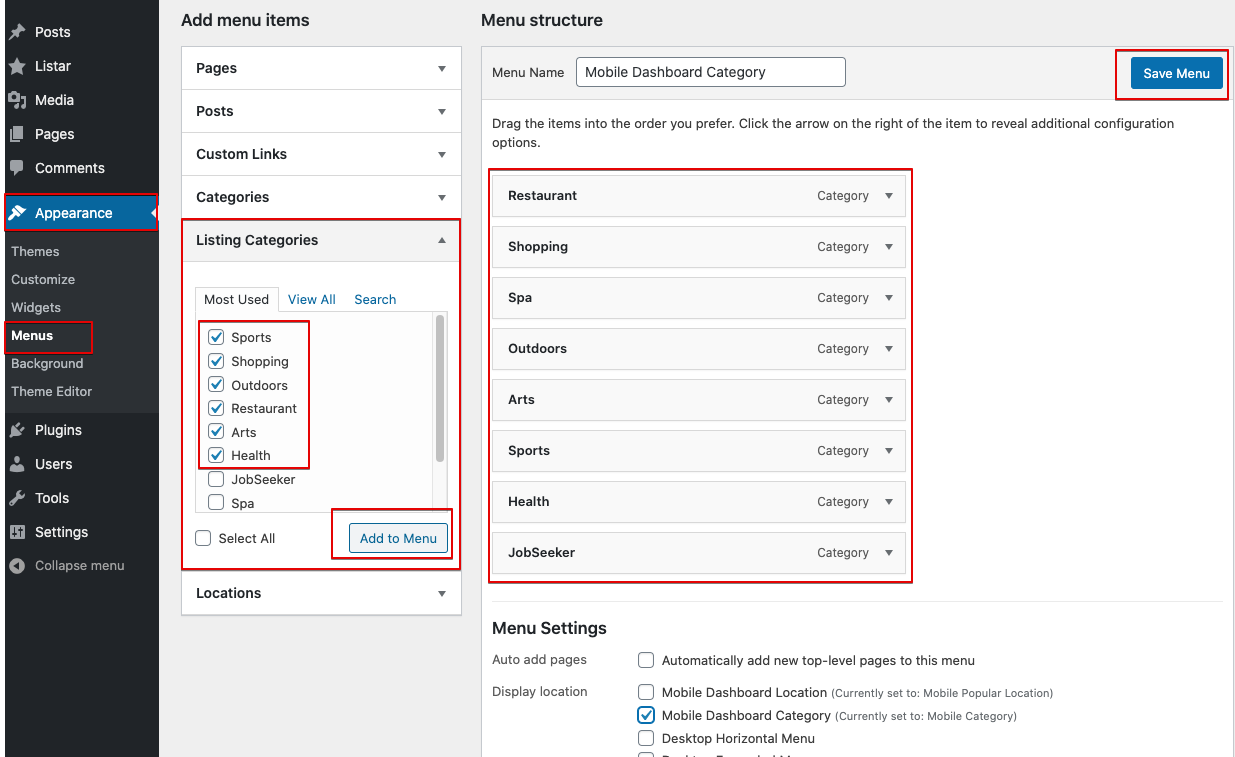
Select what categories to show on the box Add menu items → Listing Categories
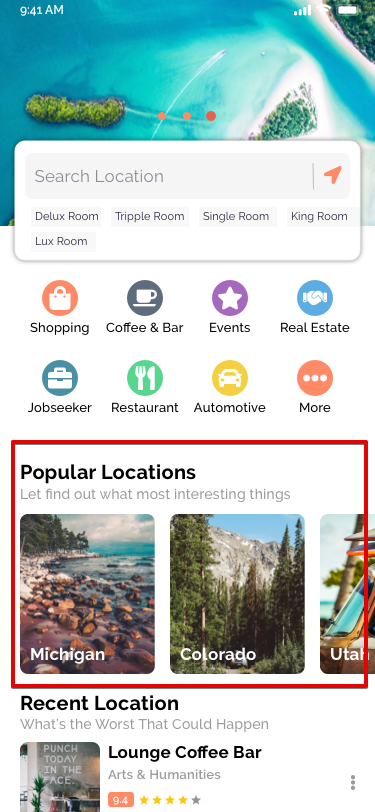
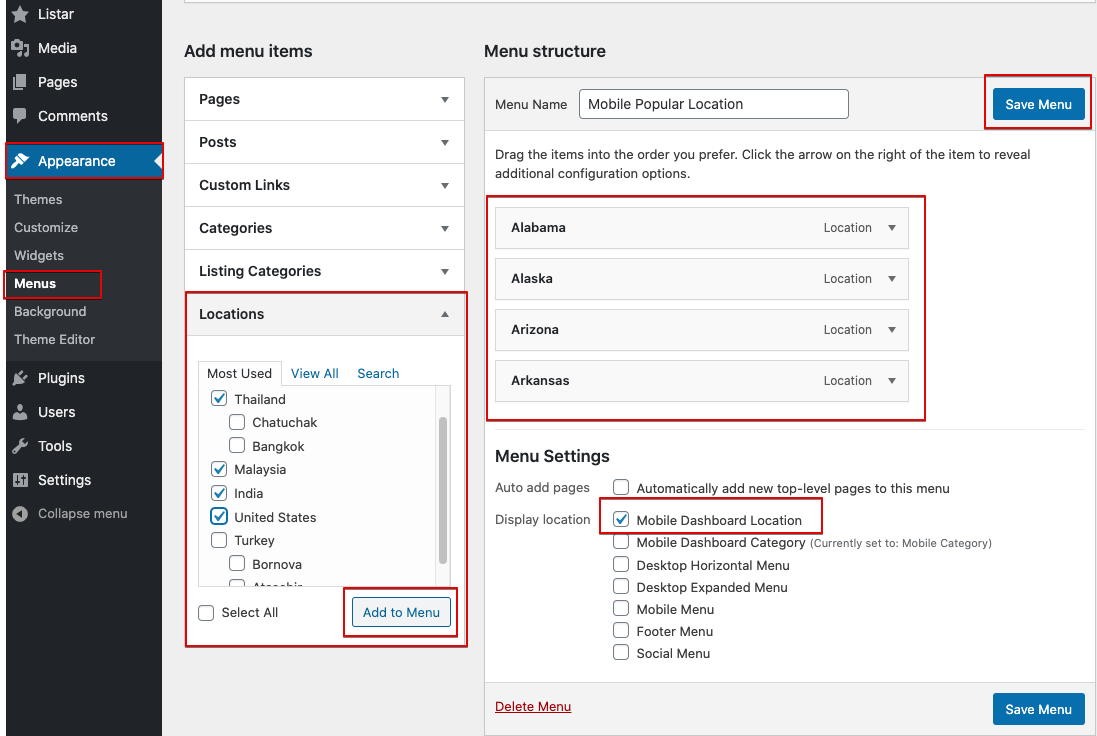
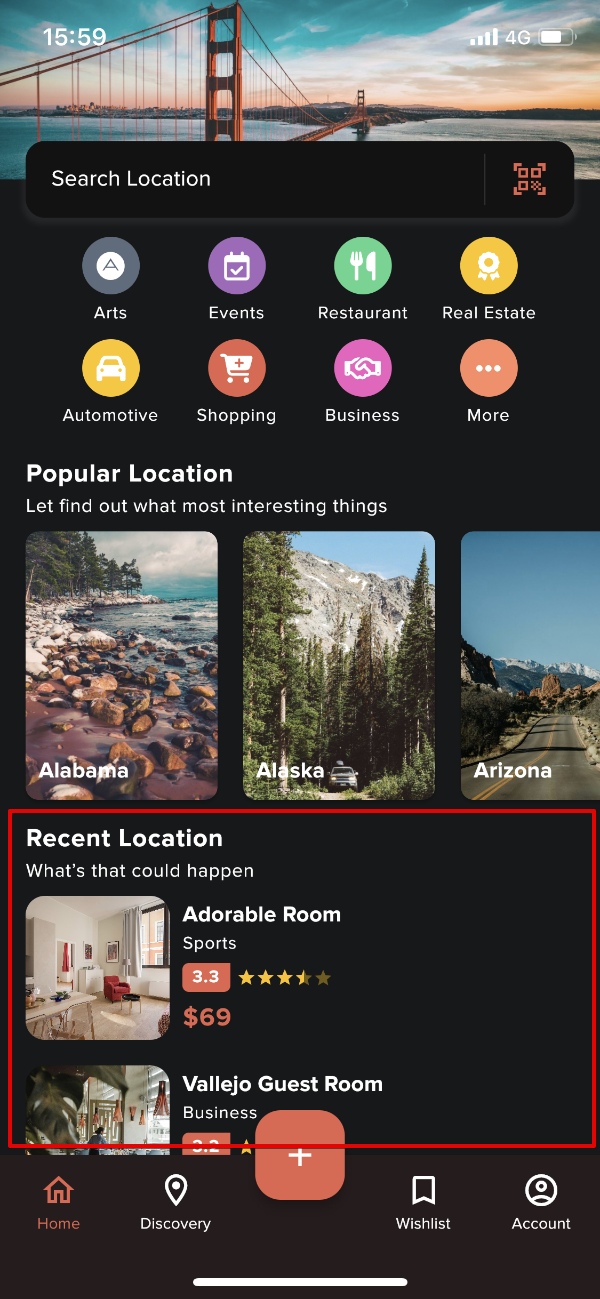
Popular Locations
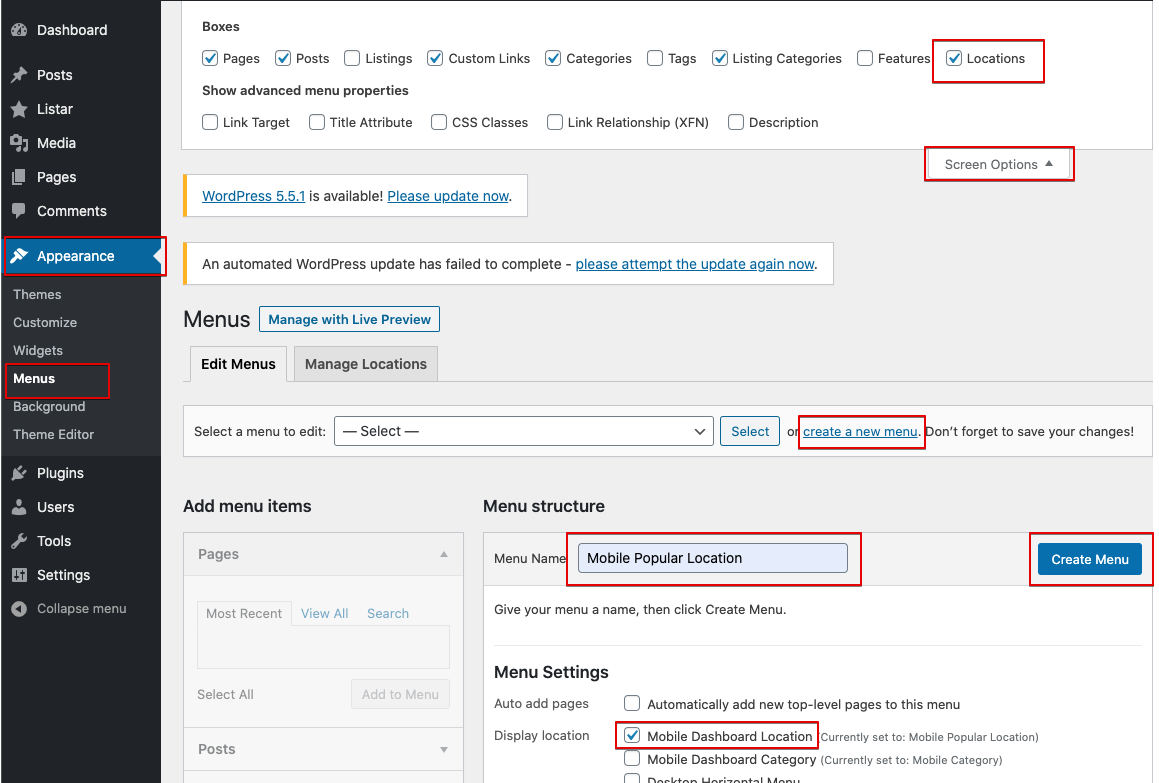
- Enable option Screen Options → Locations
- Select “create a new menu”
- Input your menu name on the filed “Menu Name.”
- Check on Menu Settings → Display location → Mobile Dashboard Location
- Press to save with the button “Create Menu“
Select what categories to show on the box Add menu items → Locations
Recent Locations
Recent location data will be obtained from the last listing data inserted from Listar → All Listings
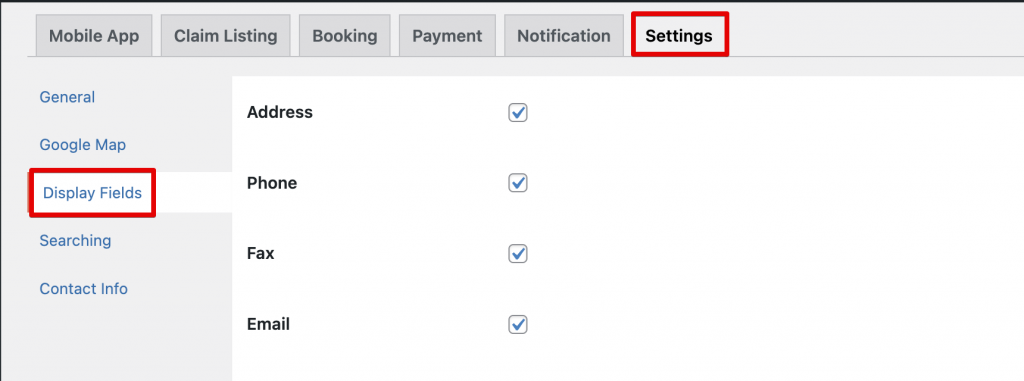
View Options
With the view options set, administrators can exercise fine-grained control over the fields visible on the detail screen.
Settings → Settings → Display Fields