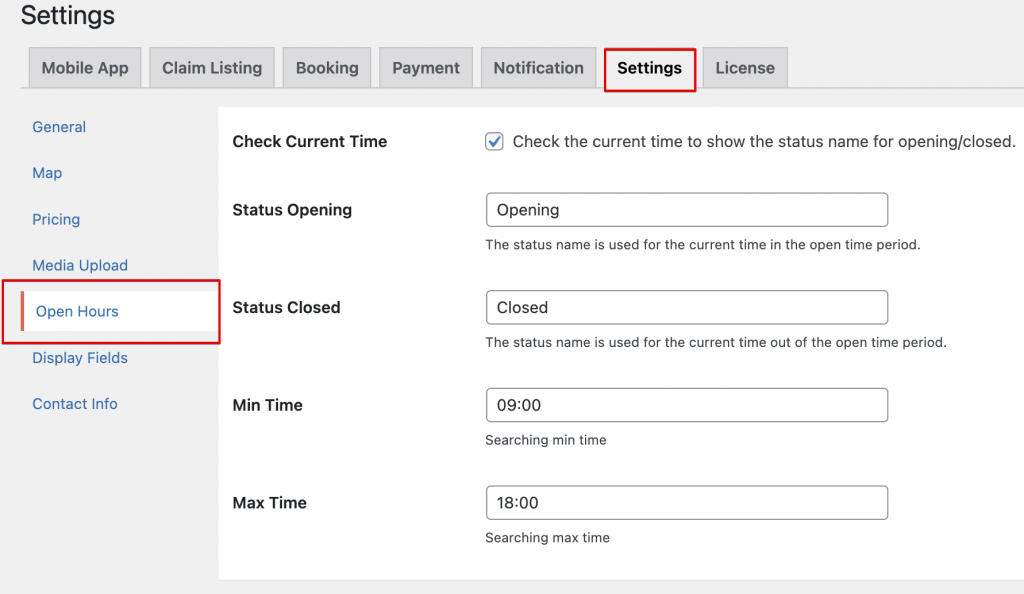
This section defines how the system determines and displays whether a business is currently Open or closed based on the real-time clock.
Options:
Check Current Time: Enable this to display live status (e.g., “Open” or “Closed”) based on the current time.
Status Opening / Status Closed: Customize the labels shown for open and closed states.
Min Time / Max Time: These are fallback or filter values used during search. Only listings within this time range will be considered open during time-based searches.
Open Hours settings
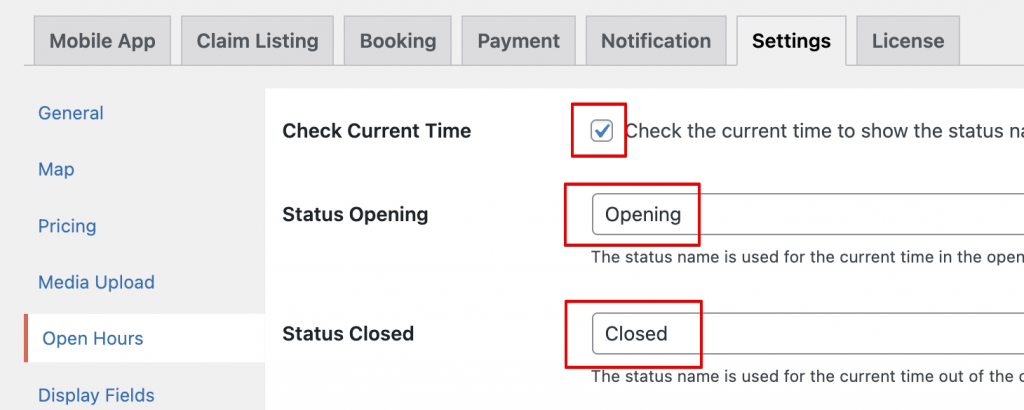
Show Listing Status Based on Opening Hours
To display whether a listing is currently Open or Closed based on real-time:
Go to Settings → Open Hours
Enable the option Check Current Time
Then configure the status labels:
Status Opening: This label appears when the current time falls within the listing’s defined open hours. Example: “Open Now”
Status Closed: This label appears when the current time is outside the listing’s open hours. Example: “Closed”
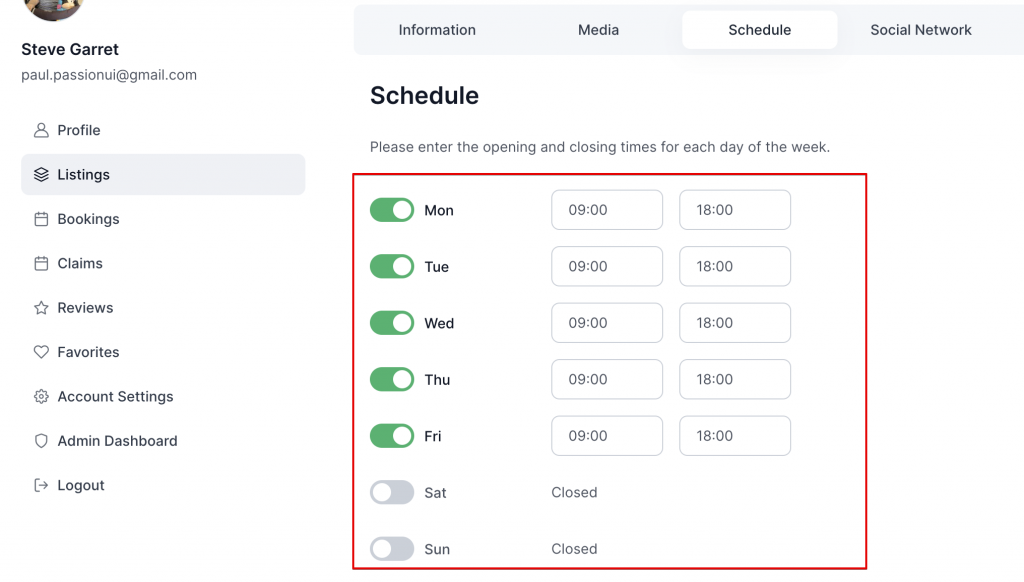
Make sure each listing has a valid weekly schedule set under the Schedule tab to ensure accurate status detection.
Settings check current time & opening schedule
Schedule listing will be check with current time
Listing schedule setting
Migration Guide: Version 2 → Latest
In the latest version of our theme/plugin, the schedule data is now stored in a new, dedicated database table instead of post meta. If you’re upgrading from version 2, you’ll need to migrate your existing data.
You must run the following WP-CLI command to migrate old location data:
wp listar-migrate schedule
What this command does:
It scans all posts with location metadata from version 2.
It transfers this data into the new wp_listar_open_hours for improved performance and flexibility.
How to Run the Command
Access your server via SSH.
Navigate to your WordPress installation directory. cd /var/www/html/
Run the migration command: wp listar-migrate schedule